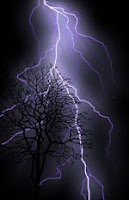
To Design the Lightnings - Tutorial of Photoshop

What I will go to illustrarvi now is a rather simple technique, but than great effect. The objective of this tutorial is that one to learn to design a lightning.
We create a new space of empty job and fill up the background with the black color.
We create a new level and we open the panel of drafts of the level.
We activate the effect external flare using these values:
Method of fusion - > Normal
Opacity - > 100%
Dimension - > 65px
As color we choose a color clearly to half between the blue and viola. I have used a species of lilla chocolate style Milka (code color: bdb8fe)
We activate the effect now inner flare with the following values:
Method of fusion - > Normal
Opacity - > 75%
Dimension - > 1px
As color we choose a beautiful one viola always ignited to half between the blue electrical worker and it viola. (code color: 5f01fc)
To this point we take to the instrument paint-brush with a tip of 3-4 pixel and begin to trace the part centers them of the lightning with a line that goes from above towards the low in irregular way (like lightning exactly).
When you will be satisfied you take to a paint-brush still more little one 2-3 and traced the smaller ramifications, descents than dimension till that you will not have obtained a satisfactory series of ramifications, you come down till a tip of 1 pixel and wanting descents also the opacity.
To this point you add slowly in first as an example the shape of a tree and will obtain an optimal effect.
